Lab 3 - Safety Dance (Fall 2021)
Mini-lecture - Forward Kinematics
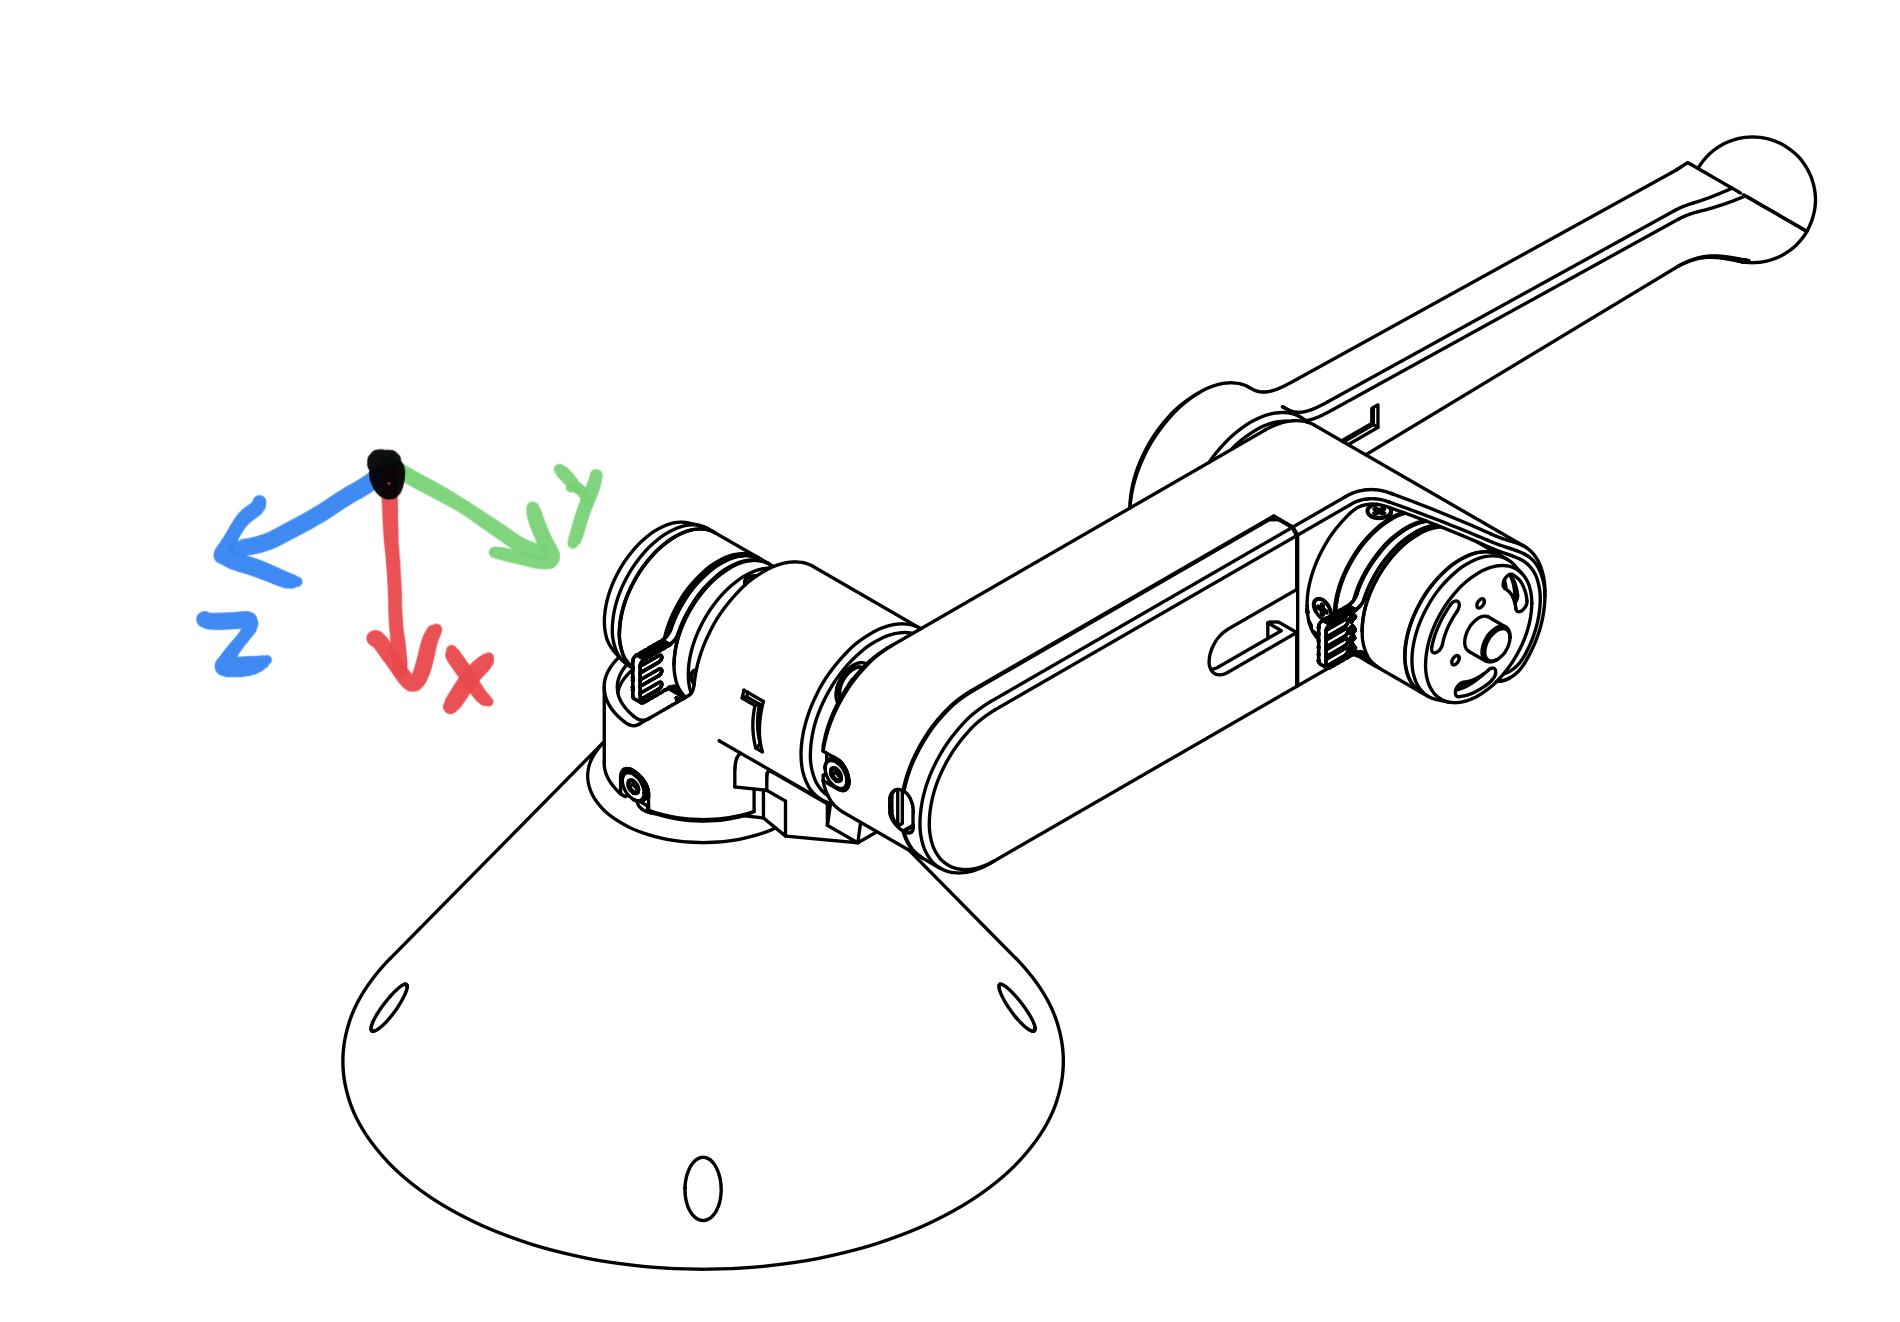
3D illustration of motor angles, directions of positive rotation, and relevant geometry.

Problem statement.

Coordinate frame, link lengths, and leg origin illustration.
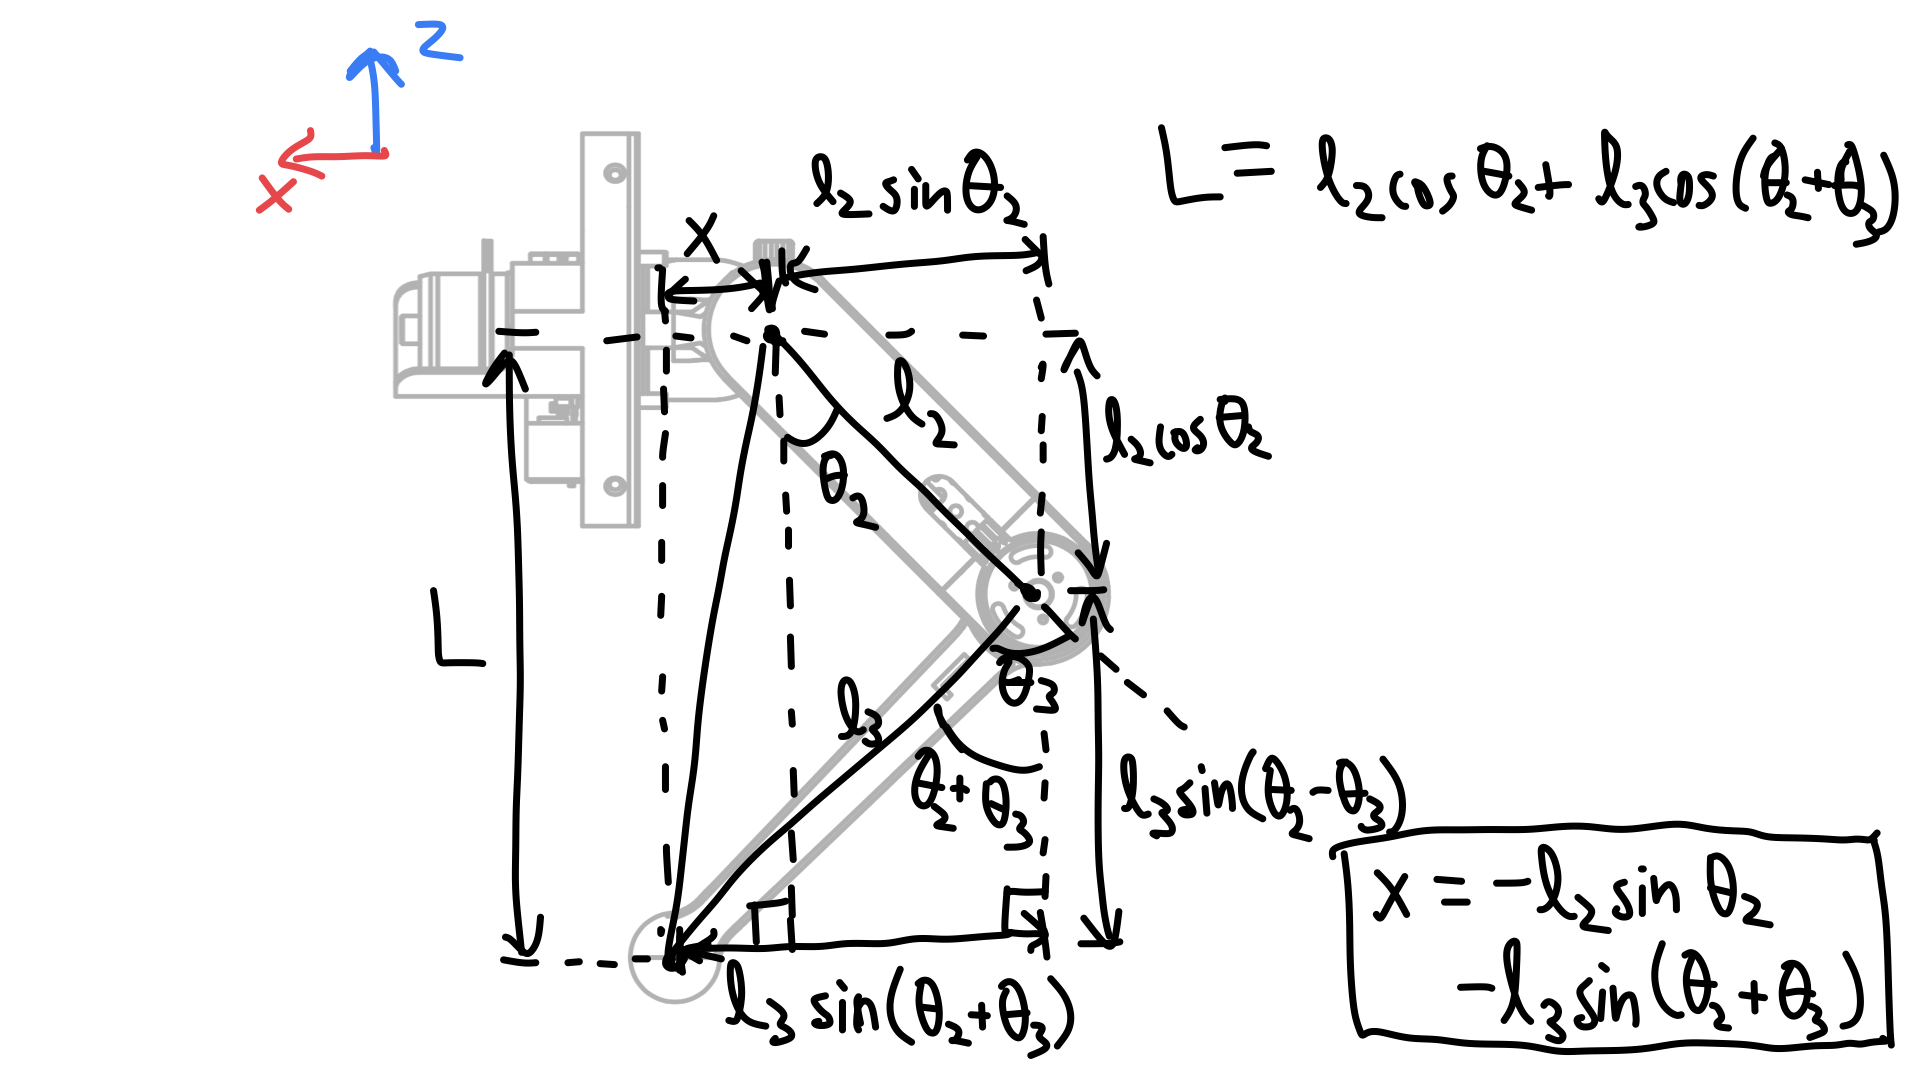
Derivation of x coordinate of foot and L.
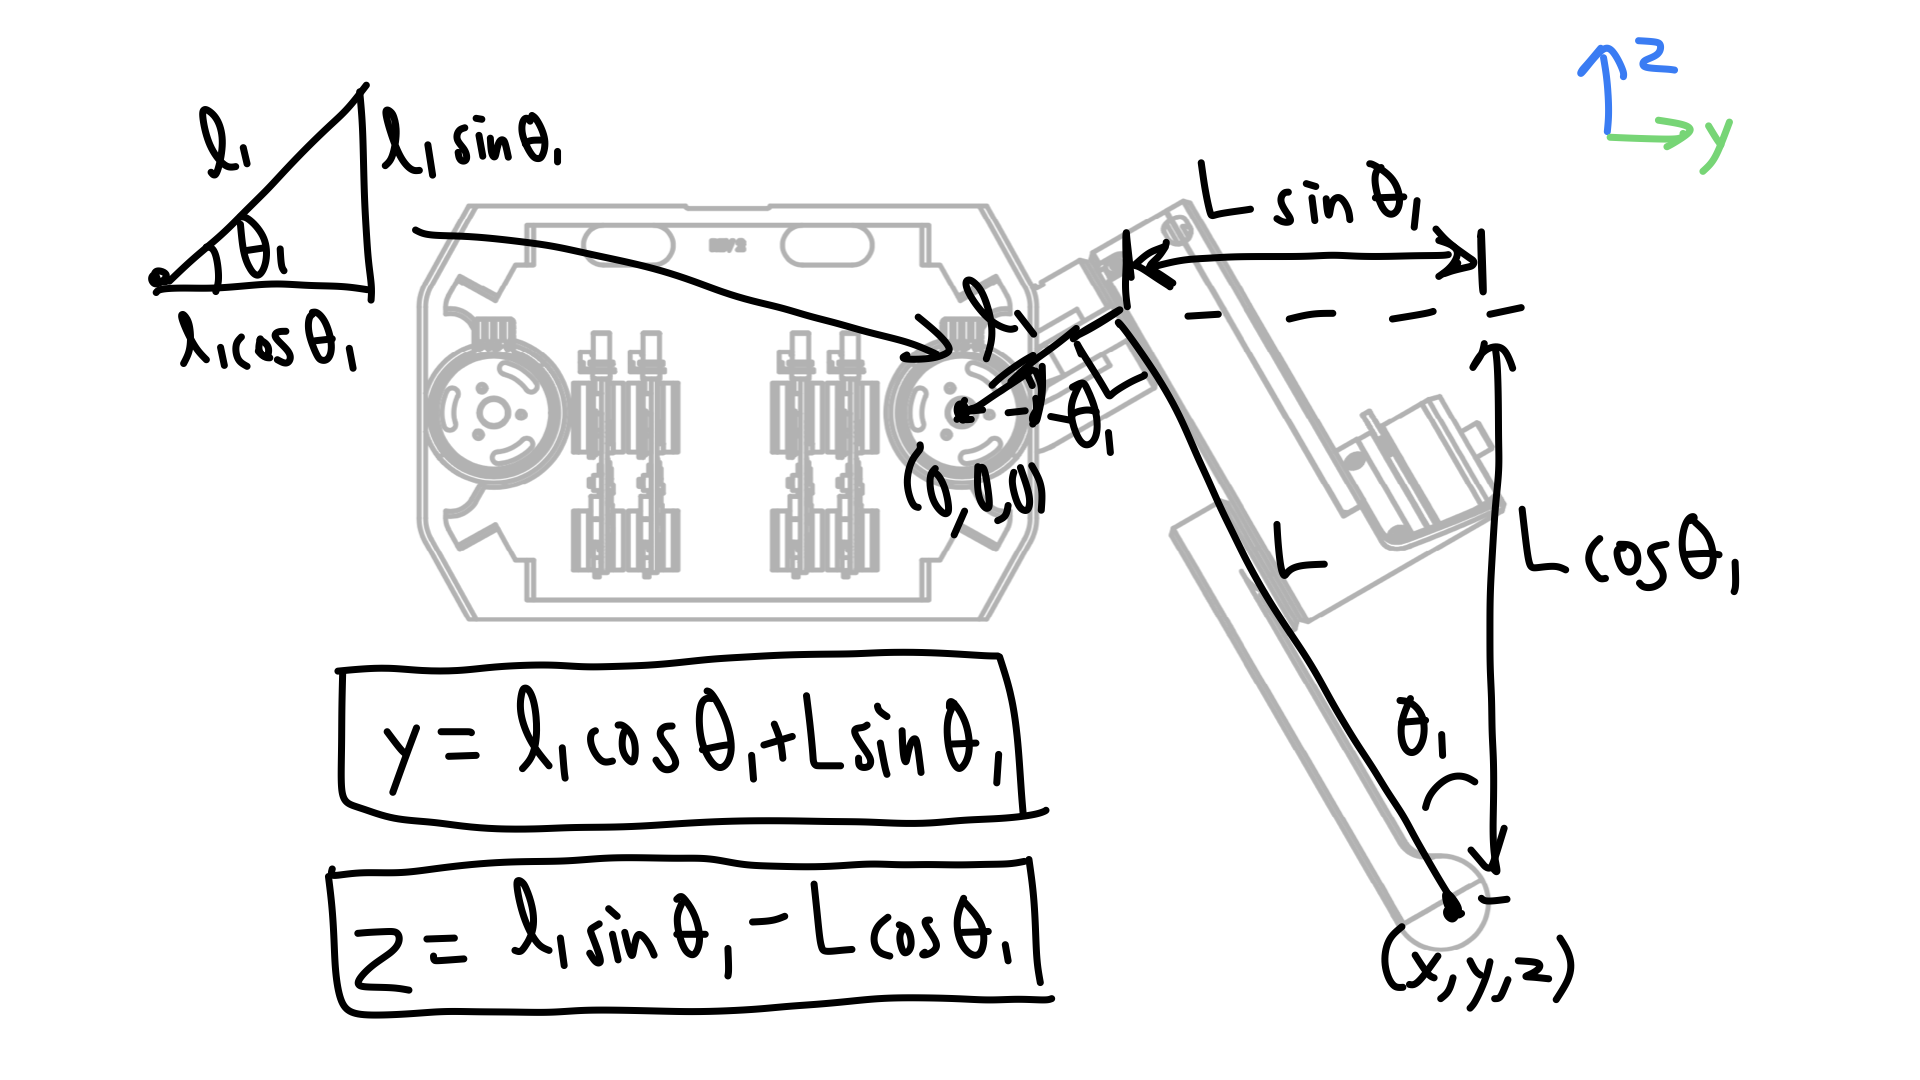
Derivation of y and z coordinate of foot.
Lab Instructions
Step 0. Get the starter code
Get the starter code https://github.com/stanfordroboticsclub/independent-study-lab2
Make sure to follow the installation instructions for the repo.
Step 1. Prepare hardware
Set the controller for the base actuactor of the robot arm to 1 (1 blink).
Set the controller for the shoulder actuactor of the robot arm to 2 (2 blinks).
Set the controller for the elbow actuactor of the robot arm to 3 (3 blinks).
Make sure all the motor controllers are plugged into the CAN 2 bus (the set of connectors near the Teensy).
Step 1. Implement and test a forward kinematics function
Determine if you have a right or left robot leg (there’s a L or R on the lower link).
Update line 15 of src/main.cpp based on the what side leg you have.
Complete the forward_kinematics function inside of src/kinematics.h. You should return a BLA::Matrix<3> of the cartesian coordinates of the end-effector.
Upload code.
Press s to start. The starter code will first test your kinematics code and then run the main loop.
Step 2. View cartesian coordinates of end effector
Start the robot from the zero position. See picture below
Print out the cartesian coordinates of the end effector using your forward kinematics function
A left robot arm in the starting position for lab 2 and its coordinate system.
Step 3. Make a safety box
Pick a “safety” box – a virtual box in cartesian coordinates that the robot can operate safely in. For example, -0.1<x<0.1 and -.1<y>0.1 and 0<z<-0.2.
Print a warning whenever the robot leaves the safety box.
Step 4. Do the safety dance
Make a function to vibrate the motors (high frequency, low amplitude torque command sinusoid)
If you program a torque sinusoid, a safe range for the amplitude is around 500 - 4000mA. Any lower is barely perceptible.
Run the function whenever the robot end effector leaves the safety box.
[gif of completed project]